Opportunities in the Wet
Excessive rain is testing the nerves of many croppers and graziers. These wet conditions are creating challenges in the lead up to harvest and for those trying to make quality fodder.
According to Southern Farming Systems Chairman Scott Chirnside the challenges over this Spring can also be seen as an opportunity. “Thinking drought preparedness is unlikely to be on most people’s minds, but this might be the year to consider making silage out of some compromised crops or excessive pasture growth that will be too difficult to make into hay or graze effectively” Scott said.
The advantage of silage is its shorter curing time, with the preservation of feed quality achieved by excluding air and allowing anerobic bacteria to produce lactic and acetic acids, which ‘pickles’ the fodder. Most crops and pastures can be ensiled, even weeds as the ensiling process kills the viability of the seed. Virtually any fodder can be used, with the final quality depending on the amount of leaf remaining.
“Most people immediately think of silage as individual plastic wrapped round bales, but unfortunately this type of silage only stores well for one or two seasons. I’m thinking more of bunker silage that may not be used for the next ten to fifteen years. This can be a valuable survival feed source when we get the next drought. Bunker silage has the additional advantage of being able to survive fires that plague the landscape in dry conditions,” said Scott.
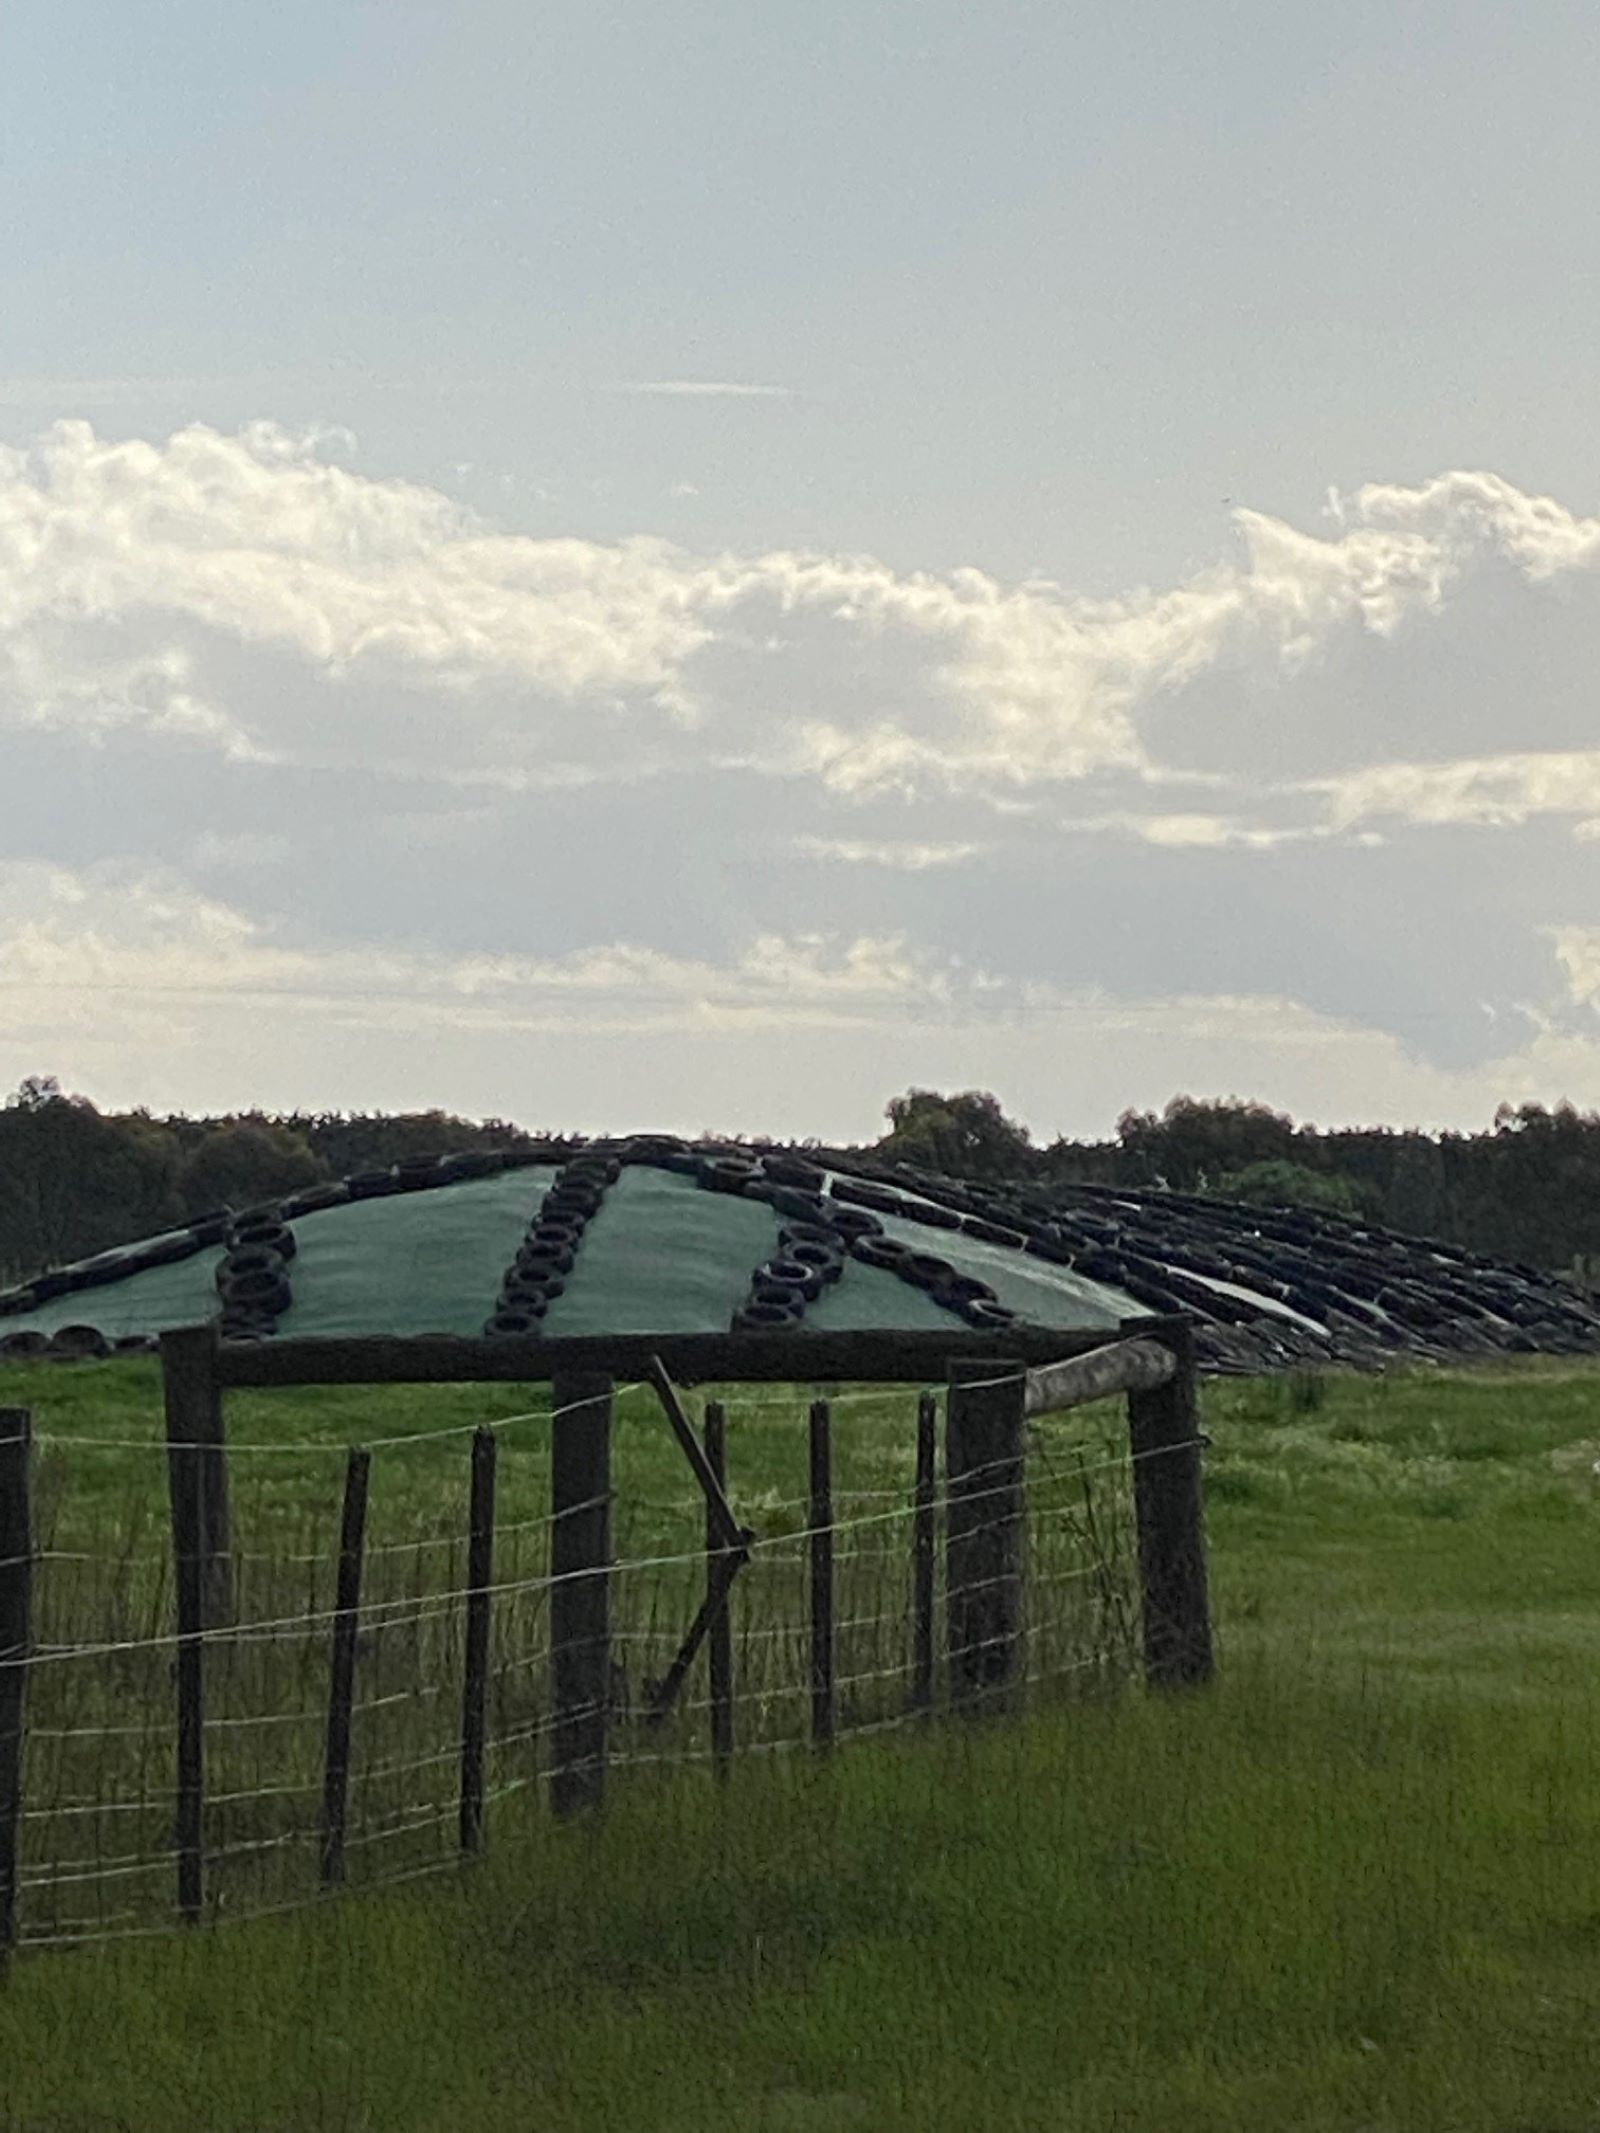
Silage bunkers can be constructed above or below ground. Either is suitable, however the above ground silage bunkers require use of heavier silage tarps and regular maintenance.
Large square bales, which are commonly used for stubble management are ideal for those who don’t have the equipment for chopped and rolled pit silage. High compressed bales stack well helping to expel air before covering.
Scott shared some of his experiences with making and using bunker silage.
“The first underground system I worked on was in New South Wales in 1976. It was a traditional chopped silage from grass, put into a pit cut into the side of a hill. The equipment used was a silage cart and tip truck and the farm tractor was used to roll the pit to expel the air, then it was covered with just soil using no plastic. We were challenged by the speed of filling, weight of rolling machine and keeping the moisture level to around 40%, but the material extracted later was still a valuable source of feed”.
“The system I used while farming in Victoria was introduced to me by Bruce Wilson (Founding Chairman of Southern Farming Systems). This made use of big square bales covered with plastic and soil. I liked the system, but the following considerations are important”.
Here are Scott’s tips for successful silage making:
Pit siting and construction
The site must be on higher ground as this allows any excess moisture to drain away. A central location on the farm is ideal to minimise the distance travelled when both filling and feeding out from the pit. The pit can be constructed into a hill by an excavator or on a rise with a bulldozer. A slight slope on the floor of the pit allows any moisture to drain from the bottom. Ensure enough room around the entry of the pit for machinery movement of incoming and outgoing feed.
The width of the pit is up to individual and should be calculated considering length of bales going in and the reach of the machine doing the covering. We used a bale size of 900mm by 900mm by 1800mm (3’x3’x6’) and started the system stacking 4 bales wide. We used an 18-tonne excavator to dig and cover the pit and set pit widths so the excavator could reach to the centre of the pit from both sides when covering. Equal amounts of dirt were placed on each side when digging to make subsequent covering easier.
Ensure space either side of the stacked bales of about 500mm to lay plastic from the ground on one side of the stack, across the top of the stack to the ground on the other side.
The depth of the pit can vary, but a minimum of 4 bales high was always our target. As more experience was gained, 6 to 8 bales high became common, and the excavator walked on top of these heaps.
Making the silage bales
When making the square bales the material needed to be the normal 40% moisture content for silage. This meant cutting to baling varied between four and seven days. If cutting cereals, a mower conditioner or even a separate super conditioner will speed up the process.
Bales need to be as dense as possible. Use the full number of strings and knotters need to be operating well. The bales are heavier than hay and broken strings when removing the silage after a long period of time can be annoying. All the normal raking and tedding techniques can reduce the time to pressing.
Loading the pit
Baled material needs to go in the pit immediately. Bales can be shifted and stacked successfully with all the normal combinations of trucks, trailers, and farm front end loaders; however, we found the use of telehandlers assisted with gaining more pressure against each row. We also had success by building a spike plate for the excavator which handled one bale at a time but gave good downforce against bales as well as side to side force and pressure between rows. All of this could be adjusted depending on available machinery and operator.
Cover the silage with plastic after 4 or 5 rows have been placed in, to keep eliminating air as soon as possible. After plastic was placed it was immediately covered with soil. We always started by filling in either side to assist with keeping the plastic tight across the top before the layer of soil was placed on top. Cover the top with about 300mm of soil.
Consider putting a vertical plastic sheet after a certain number of bales (in our case it was 10 rows). This created cells which helped to keep the stack airtight at the end of each day, but also created cells. This was important as it prevented air infiltrating into the whole stack when the end was opened at the start of feeding.
When reaching the end of the pit, reduce the height by one or two bales at a time and cover the end plastic with a substantial amount of soil packed tightly against the vertical surface.
Ongoing maintenance
Keep the surface tidy to allow rain to run off without creating puddles. Ideally fence the area off from stock especially in the first years as cattle, if smelling silage, dig at it like a dog at a bone!
Feeding out
Opening simply requires removing the dirt from the top and some dirt from the sides. The bales can be removed with either a loader or spike plate on the excavator. The bales come out with most of their integrity if all the above processes have been followed. No silage buckets or cutters are required.
Take the opportunity to prepare in the good times.
This article is supported by Southern Farming Systems, through funding from the Australian Government’s Future Drought Fund.